How Do You Install a Decoiler Machine Correctly? A Practical Installation Guide for Safer Coil Feeding
- Share
- Issue Time
- Jun 24,2026
Summary
Learn how to install a decoiler machine correctly, including foundation preparation, coil loading, alignment, wiring, safety checks, testing, and maintenance tips from FANTY

Installing a decoiler machine may look simple, but in real factory production, correct installation directly affects safety, feeding accuracy, press productivity, material surface quality, and long-term machine life. A decoiler that is not leveled, aligned, wired, or tested correctly can cause coil slippage, unstable looping, strip deviation, feeding errors, motor overload, and unnecessary downtime.
This Decoiler Machine Installation Guide is written for production managers, maintenance engineers, purchasing teams, and factory owners who want a practical installation reference before starting a new coil feeding line. It explains what to check before installation, how to position the machine, how to align it with a straightener or servo feeder, how to load the coil safely, and how to complete the first production test.
As a manufacturer of metal coil processing equipment and stamping automation solutions, FANTY provides decoiler machines, press feeders, decoiler straighteners, decoiler straightener feeders, punch presses, and customized coil handling systems. FANTY focuses on helping factories improve coil feeding stability, reduce manual handling, and build more efficient stamping automation lines.
Table of Contents
- What Is a Decoiler Machine?
- Before Installation: What Should You Prepare?
- Step 1: Prepare the Foundation and Working Area
- Step 2: Position the Decoiler Correctly
- Step 3: Level and Fix the Decoiler
- Step 4: Align the Decoiler with the Feeder or Straightener
- Step 5: Connect Electrical, Pneumatic, or Hydraulic Systems
- Step 6: Load the Coil Safely
- Step 7: Run the First Test
- Common Installation Mistakes
- Why Choose FANTY Decoiler Solutions?
- FAQ
What Is a Decoiler Machine?
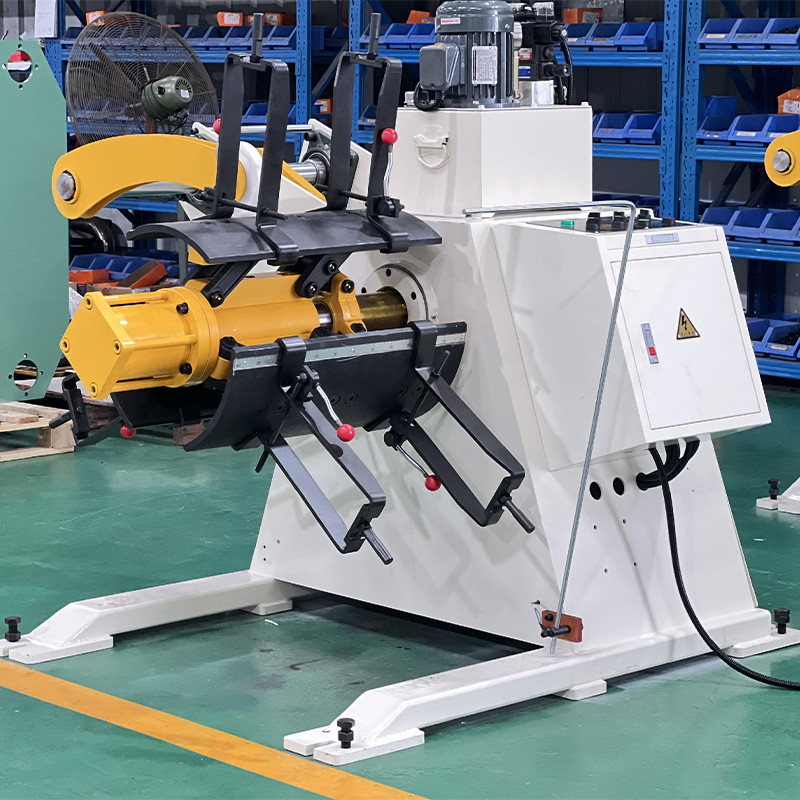
A decoiler machine, also called an uncoiler, is used to hold and unwind metal coils before the material enters a straightener, feeder, press machine, cut-to-length line, roll forming line, or other processing equipment. The decoiler supports the coil weight, controls coil rotation, and releases strip material smoothly into the next process.
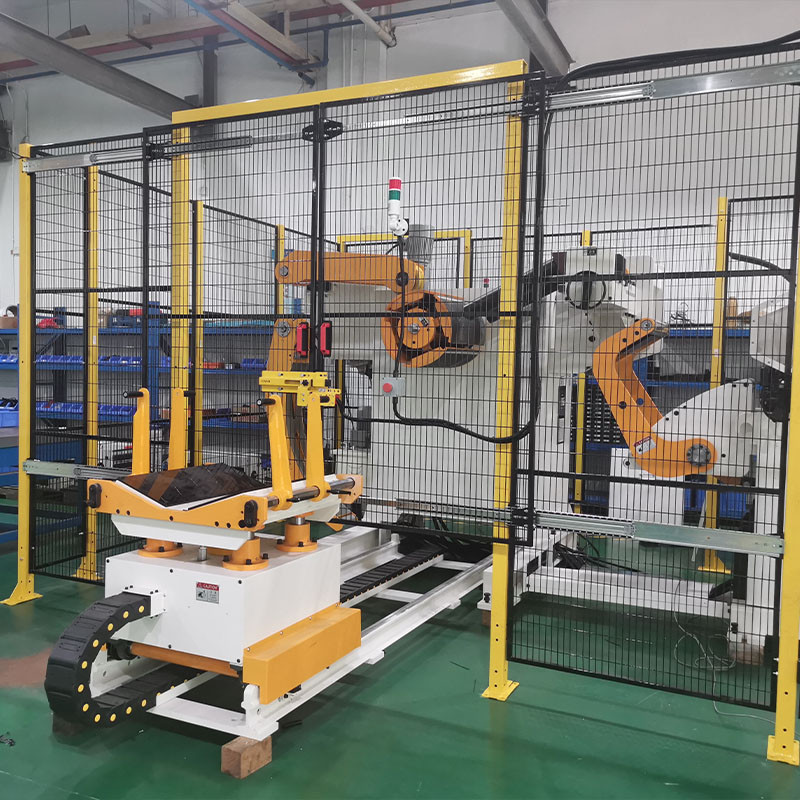
In a stamping automation line, the decoiler is not an isolated machine. It must work together with the straightener, servo feeder, press machine, loop control system, sensor, and sometimes a coil car. If the decoiler is installed incorrectly, even a high-quality feeder may not perform well because the material supply is unstable from the beginning.
| Decoiler Type | Best For | Typical Installation Focus |
|---|---|---|
| Manual Decoiler | Light coils and simple feeding applications | Leveling, coil centering, brake adjustment |
| Motorized Decoiler | Automatic feeding and medium-duty coil lines | Power connection, motor direction, loop sensor setup |
| Hydraulic Decoiler | Heavy coils and safer loading requirements | Hydraulic expansion, oil pressure, safety locking |
| Decoiler Straightener | Space-saving lines requiring uncoiling and straightening | Machine leveling, straightening alignment, feeding height |
| Decoiler Straightener Feeder | High-efficiency stamping automation | Press synchronization, servo control, coil path accuracy |
Before Installation: What Should You Prepare?
Good installation begins before the machine arrives. Many installation problems happen because the factory does not prepare the floor, power supply, space, crane, forklift, or production layout in advance. Before installing a decoiler, your team should confirm machine specifications, coil data, line direction, and downstream equipment requirements.
Key information to confirm before installation
| Item | Why It Matters | Recommended Check |
|---|---|---|
| Coil width | Determines machine width and guide position | Confirm maximum and minimum coil width |
| Material thickness | Affects feeding resistance and straightening needs | Confirm actual material range |
| Coil weight | Determines decoiler capacity and foundation demand | Never exceed rated capacity |
| Coil inner diameter | Determines mandrel expansion range | Match coil I.D. with machine design |
| Line direction | Affects machine orientation and rotation direction | Confirm left-to-right or right-to-left feeding |
| Feeding height | Ensures smooth material entry into feeder | Check center height of downstream equipment |
| Power supply | Prevents electrical mismatch | Confirm voltage, phase, and frequency |
Step 1: Prepare the Foundation and Working Area
The foundation is the base of safe decoiler operation. If the floor is uneven, weak, or unstable, the machine may vibrate, shift, or lose alignment over time. For heavy coils, the floor must be strong enough to support both the machine weight and maximum coil weight.
Foundation preparation checklist
- Clean the installation area and remove scrap, oil, dust, and unnecessary tools.
- Make sure the floor is flat, strong, and suitable for industrial equipment.
- Confirm enough space for coil loading by crane, forklift, or coil car.
- Leave enough maintenance space around the machine.
- Check whether anchor bolts are needed for the selected decoiler model.
- Reserve space for electrical cabinet, hydraulic station, pneumatic parts, and operator panel.
For a simple light-duty decoiler, the installation requirement may be relatively easy. For a hydraulic decoiler handling heavy coils, the foundation and loading path become much more important. A narrow or crowded installation area can increase safety risks during coil loading.

Step 2: Position the Decoiler Correctly
After the foundation is ready, position the decoiler according to the production line layout. The decoiler should be placed in line with the downstream straightener, feeder, or press machine. The coil centerline should match the material path as closely as possible.
Incorrect positioning can cause strip deviation, edge damage, uneven feeding tension, and frequent adjustment during production. For automatic stamping lines, a small alignment error at the decoiler may become a bigger problem at the feeder or die area.
Positioning points
- Confirm the feeding direction before placing the machine.
- Place the decoiler so the coil unwinds in the correct direction.
- Keep the decoiler centerline aligned with the feeder centerline.
- Leave enough distance for loop formation between machines.
- Make sure operators can access the control panel safely.
- Keep the coil loading side clear for forklift, crane, or coil car operation.
| Installation Area | Good Practice | Risk If Ignored |
|---|---|---|
| Coil loading side | Keep enough open space | Difficult loading and higher safety risk |
| Operator side | Allow safe access to controls | Slow response during emergency or adjustment |
| Material path | Keep centerline straight | Strip deviation and edge damage |
| Loop area | Reserve enough material buffer space | Unstable feeding and line stops |
Step 3: Level and Fix the Decoiler
Once the decoiler is positioned, the machine should be leveled carefully. Leveling helps the mandrel support the coil evenly and reduces vibration during rotation. A decoiler that is not level may cause coil movement, material deviation, abnormal noise, and long-term mechanical wear.
How to level the decoiler
- Use a precision level to check the machine base.
- Adjust the machine feet or shims until the frame is level.
- Check both left-right and front-back directions.
- Confirm that the mandrel axis is stable and horizontal.
- Fix the machine with anchor bolts if required.
- Recheck the level after tightening bolts.
For heavy-duty decoilers, do not skip anchor fixing when recommended by the manufacturer. Coil rotation produces dynamic forces, especially during starting and stopping. Proper fixing improves safety and protects alignment.
Step 4: Align the Decoiler with the Feeder or Straightener
Alignment is one of the most important parts of decoiler installation. The coil strip must leave the decoiler and enter the straightener or feeder smoothly. If the path is not straight, the material may move sideways, scratch, wrinkle, or feed inaccurately.
Alignment checklist
- Check that the decoiler mandrel centerline matches the feeder centerline.
- Confirm that the material enters the next machine without twisting.
- Adjust side guides according to coil width.
- Check feeding height and entry angle.
- Make sure the material does not rub against machine frames or guards.
- Use test strip movement to verify smooth feeding before production.
If the decoiler is used with a straightener feeder or servo feeder, alignment should be checked across the full feeding path. The material should not be forced into the feeder at an angle. Forced entry may temporarily work, but it often causes roller wear, surface scratches, and inaccurate feeding.
| Alignment Problem | Possible Result | Correction Method |
|---|---|---|
| Decoiler centerline is offset | Strip deviation and side rubbing | Reposition decoiler or adjust downstream machine |
| Feeding height is incorrect | Material bending or unstable loop | Adjust machine height or use proper layout design |
| Side guide is too tight | Edge damage and feeding resistance | Adjust guide clearance |
| Side guide is too loose | Material wandering | Set guide according to actual coil width |
Step 5: Connect Electrical, Pneumatic, or Hydraulic Systems
Different decoiler models require different connections. A manual decoiler may need minimal connection, while a motorized or hydraulic decoiler requires electrical wiring, control signals, hydraulic oil checks, pneumatic connections, sensor setup, and safety device testing.
Electrical connection
- Confirm voltage, phase, and frequency before wiring.
- Check grounding to protect operators and equipment.
- Verify motor rotation direction before loading the coil.
- Inspect the control panel, emergency stop, and indicator lights.
- Confirm communication signals with feeder or press if required.
Hydraulic connection
- Check hydraulic oil level before operation.
- Inspect hoses, joints, cylinders, and pressure gauge.
- Test mandrel expansion and contraction without coil first.
- Check whether pressure holds stable after expansion.
- Look for oil leakage during the first test.
Pneumatic connection
- Confirm air pressure meets machine requirement.
- Check air pipes and fittings for leakage.
- Test pneumatic pressing arm or brake if included.
- Drain water from air supply system regularly.
Step 6: Load the Coil Safely
Coil loading is one of the highest-risk operations in decoiler use. A steel coil can be extremely heavy. If it is not loaded correctly, it may slip, tilt, damage the machine, or injure operators. Before loading, confirm the coil weight is within the rated capacity of the decoiler.
Safe coil loading process
- Confirm coil specification: width, thickness, I.D., O.D., and weight.
- Check that the decoiler mandrel is fully contracted before loading.
- Use a crane, forklift, or coil car suitable for the coil weight.
- Move the coil slowly and keep operators away from the danger zone.
- Place the coil onto the mandrel carefully and center it.
- Expand the mandrel to hold the coil firmly.
- Use a pressing arm or coil keeper if the coil is loose or heavy.
- Remove coil straps carefully according to your factory safety procedure.
For heavy coils, FANTY often recommends using a coil car to improve loading safety and efficiency. A coil car helps position the coil accurately and reduces the risk of manual handling errors.
| Loading Method | Best For | Advantage |
|---|---|---|
| Forklift loading | Small and medium coils | Flexible and common in many workshops |
| Crane loading | Large or heavy coils | Useful when floor space is limited |
| Coil car loading | Frequent coil changes and heavy coils | Safer, faster, and more accurate |
Step 7: Run the First Test Before Production
After installation and coil loading, do not immediately start full-speed production. The first test run should be slow and controlled. The goal is to confirm that the decoiler rotates correctly, the coil is secure, the material path is smooth, and the downstream equipment receives material without abnormal tension.
First test run checklist
- Run the decoiler without coil first if possible.
- Check motor direction and control response.
- Test mandrel expansion and contraction.
- Load coil and run at low speed.
- Observe coil rotation and loop formation.
- Check whether material enters the feeder smoothly.
- Test emergency stop function.
- Inspect for vibration, abnormal noise, oil leakage, or material rubbing.
- Gradually increase speed only after stable low-speed operation.
During the first test, the maintenance engineer should watch the coil, loop, feeder entry, side guide, motor, sensor, and hydraulic system. Any small abnormal sign should be corrected before production speed is increased.
Common Decoiler Installation Mistakes
Many decoiler problems are not caused by poor machine quality. They are caused by installation mistakes. Avoiding these mistakes can greatly improve production reliability.
| Installation Mistake | Possible Problem | Better Practice |
|---|---|---|
| Ignoring machine leveling | Vibration, coil movement, uneven wear | Level the machine carefully before loading coil |
| Poor centerline alignment | Strip deviation and edge damage | Align decoiler with feeder and press line |
| Not checking motor direction | Incorrect unwinding and material tension | Test motor direction before production |
| Insufficient loop space | Unstable feeding and frequent line stops | Reserve proper buffer distance |
| Overloading the decoiler | Safety risk and machine damage | Always follow rated capacity |
| Skipping safety test | Higher accident risk | Test emergency stop and guards before production |
Recommended Installation Acceptance Checklist
Before accepting the installation, your team should complete a final inspection. This checklist helps ensure the decoiler is ready for stable production.
Mechanical Check
- Machine is level and stable.
- Anchor bolts are tightened if required.
- Mandrel expands and contracts smoothly.
- Coil is centered and secure.
- No abnormal vibration during rotation.
Electrical Check
- Power supply matches machine requirement.
- Grounding is correct.
- Motor direction is correct.
- Control buttons work properly.
- Emergency stop works immediately.
Hydraulic / Pneumatic Check
- Oil level is correct.
- No leakage from hoses or fittings.
- Pressure is stable.
- Pneumatic pressure is suitable.
- Pressing arm works smoothly if included.
Production Check
- Material path is straight.
- Loop control is stable.
- Feeder receives material smoothly.
- No material scratching or edge damage.
- Low-speed and normal-speed tests are stable.
Why Choose FANTY for Decoiler Machines and Coil Feeding Lines?
Choosing a decoiler is not only about buying one machine. It is about building a stable coil feeding process. FANTY helps manufacturers select and customize metal coil processing equipment according to coil data, press requirements, workshop layout, and automation goals.
FANTY’s product range includes decoiler machines, press feeders, decoiler straighteners, decoiler straightener feeders, punch presses, and transfer systems. For factories that want to reduce manual handling, improve safety, and increase line efficiency, FANTY can provide both individual machines and complete stamping automation solutions.
FANTY advantages for installation and long-term use
- Practical machine selection based on real coil specifications.
- Customized layout support for stamping automation lines.
- Heavy-duty machine structures for stable coil handling.
- Options such as hydraulic expansion, pressing arm, coil car, and side guide.
- Solutions for automotive parts, home appliances, construction, electronics, and metal processing industries.
- Online after-sales support and technical communication for equipment use.
Need a Decoiler Installation Layout?
Send FANTY your coil width, thickness, coil weight, coil I.D., coil O.D., material type, press model, and workshop layout. Our team can help you select a suitable decoiler or complete coil feeding solution.
Contact FANTY NowFinal Thoughts
A decoiler machine installation should never be treated as a quick placement job. Correct installation includes foundation preparation, machine positioning, leveling, fixing, alignment, wiring, hydraulic inspection, coil loading, safety testing, and trial production. Each step affects feeding stability and long-term equipment performance.
If your decoiler is installed correctly, your coil feeding line will be safer, smoother, and more efficient. If installation is rushed, the factory may face repeated feeding problems, material scratches, coil deviation, unstable loop control, and unnecessary downtime.
For manufacturers planning a new stamping line or upgrading an old coil feeding system, FANTY can support decoiler selection, layout planning, and customized coil processing solutions. A well-installed decoiler is the first step toward reliable stamping automation.
FAQ: Decoiler Machine Installation Guide
How do you install a decoiler machine?
To install a decoiler machine, prepare a flat foundation, position the machine according to the line layout, level and fix the frame, align it with the feeder or straightener, connect electrical or hydraulic systems, load the coil safely, and complete a low-speed test run before production.
Does a decoiler need anchor bolts?
Some light-duty decoilers may not require anchor bolts, but heavy-duty decoilers and high-speed coil feeding lines often need proper fixing. Always follow the machine specification and installation recommendation.
How much space is needed between a decoiler and feeder?
The required space depends on coil thickness, line speed, loop control method, and machine layout. There should be enough room for a stable material loop without touching the floor or creating excessive tension.
Why is decoiler alignment important?
Alignment ensures that the strip enters the feeder or straightener smoothly. Poor alignment can cause strip deviation, edge damage, surface scratches, feeding errors, and higher roller wear.
Can I install a decoiler by myself?
Simple manual decoilers may be installed by experienced factory technicians. Motorized, hydraulic, or automatic decoiler systems should be installed by qualified mechanical and electrical personnel to ensure safety and performance.
What should be checked before loading a coil?
Before loading, check the coil width, thickness, weight, inner diameter, outer diameter, decoiler capacity, mandrel condition, loading direction, and safety area around the machine.
Does FANTY provide decoiler installation support?
FANTY provides technical communication, equipment selection guidance, layout suggestions, and customized coil handling solutions to help customers build more stable stamping automation lines.