How Does a Decoiler Mandrel Grip a Coil?
- Share
- publisher
- David Park - Senior Stamping Engineer, FANTY Machinery
- Issue Time
- Sep 18,2026
Summary
Braking torque passes through a friction joint between mandrel segments and the coil bore, and that joint has far more capacity than the brake can demand. The expansion cycle step by step.
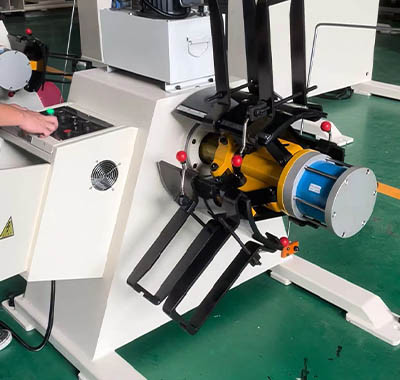
Watch a coil change on a well-set line and the mandrel does its work in under four seconds. The coil is lifted, slid onto the collapsed mandrel, the operator presses a button, and the segments push out until they touch the bore. Nothing dramatic happens — and that is the point. When a coil slips on the mandrel under braking torque, the failure is almost never "not enough pressure". It is roundness, oil, or a worn segment, and all three are measurable before the coil goes on.
This is the sequence I use when training operators on a decoiler mandrel: what physically holds the coil, how the expansion cycle works, how to read grip from the machine's behaviour, and what to check before every coil change. If you are specifying a machine rather than running one, the standard mandrel and reel options are listed in the product range.
What Physically Holds the Coil
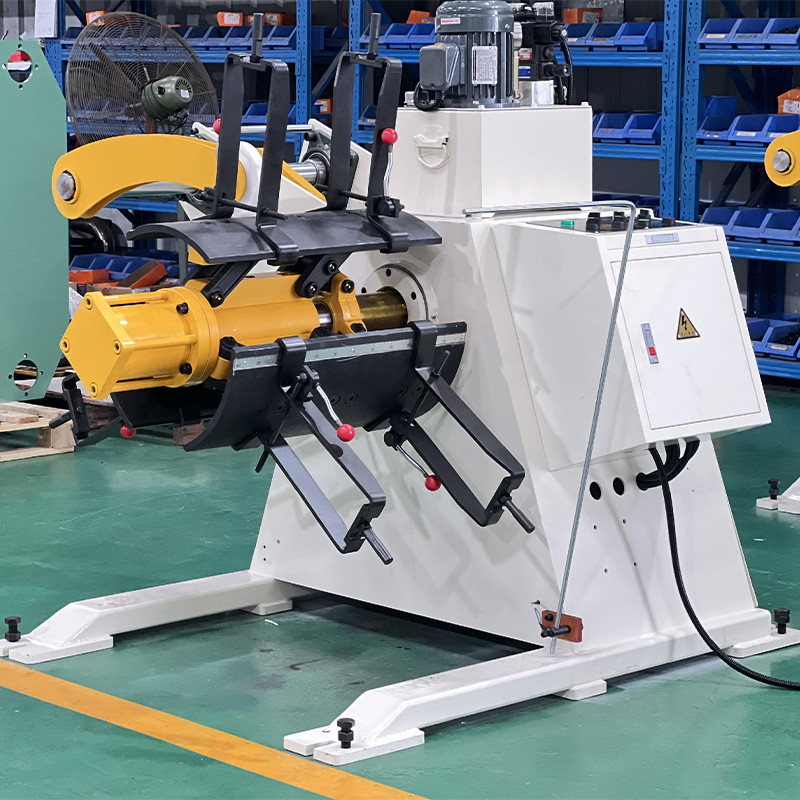
A mandrel is a drum that changes diameter. In its collapsed state it measures roughly 480–485 mm so a 508 mm coil bore slides on with clearance. Expanded, the segments travel out 12–25 mm and press against the bore wall around the full circumference, or around most of it.
Three mechanisms do the expanding, and they behave differently in service.
Hydraulic expansion is the most common on machines above about 5 tonnes. A cylinder inside the drum pushes a tapered wedge under each segment; pressure is set at the hydraulic unit, typically 80–140 bar, and every segment sees the same force. It holds pressure while the coil is loaded, so grip does not relax if the coil settles.
Mechanical screw expansion uses a handwheel and a threaded taper. It is common on smaller and older machines because it needs no hydraulics. The advantage is that it cannot lose pressure; the disadvantage is that the operator sets the grip by feel, and the grip differs between operators and between coils.
Pneumatic expansion sits in between, using an air cylinder at 6–8 bar. It is fast and clean, but air is compressible, so a pneumatic mandrel is less rigid under braking torque and is normally limited to lighter coils.
Whichever mechanism you have, the physics of grip is identical. Braking torque is transmitted through friction between the segment faces and the coil bore. That gives a simple relationship worth remembering: the torque the mandrel can hold equals the friction coefficient times the total normal force times the bore radius.
Run the numbers on a typical 12-tonne coil, 508 mm bore, 1,250 mm outer diameter, with a brake set to 2,400 N·m. At a bore radius of 0.254 m, the tangential force needed is 2,400 ÷ 0.254, or about 9,450 N. With a friction coefficient of 0.20 between hardened segment faces and a dry steel bore, the normal force required is 9,450 ÷ 0.20, or roughly 47,250 N. Spread over four segments with a total contact area of about 0.14 m², that is a pressure of roughly 3.4 bar.
The hydraulic unit runs at 80–140 bar. That is the useful insight: a properly built mandrel has an order of magnitude more grip available than the brake can demand. When a coil slips, the answer is not more pressure — it is that the pressure is no longer reaching the bore.
The Expansion Cycle, Step by Step
- Collapse and confirm. Retract the segments fully and confirm the collapsed diameter with a gauge rather than by eye. A segment that is 3 mm proud because of packed debris will not let the coil slide on, and the operator will force it and score the bore.
- Check the bore, not just the outside. Look into the coil eye with a light. Rust scale, a deformed first wrap, or a crushed bore from a previous handling error will all reduce contact. If the bore is oval by more than 5 mm across the diameter, expect two segments to carry the load and the other two to do nothing.
- Align the coil car to the mandrel centreline. The coil should slide on under hand force. If it needs a push, the car height or lateral position is off, and forcing it damages both the bore and the segment faces.
- Centre the coil on the drum. Coil width should sit within about 20 mm of centre. Off-centre loading puts an overturning moment into the mandrel bearing and into the expansion mechanism, and it shows up later as uneven segment wear.
- Expand to pressure, then hold. Bring the hydraulic unit up to its set pressure and leave it on. On a mechanical mandrel, tighten until the coil will not turn by hand, then a further quarter turn — no more, because the taper multiplies hand force quickly.
- Verify grip before releasing the car. With the coil car still supporting the coil, jog the mandrel against the brake. If the coil turns relative to the mandrel, stop and find out why. Finding it with the car in place costs two minutes; finding it with the coil at full speed costs a coil and possibly a mandrel.
- Lower the car and confirm the hold-down or peeler position. The equipment downstream should not be under load until the coil is stable on the mandrel. A peeler arm that presses the coil before the mandrel is gripping will rotate the coil on the drum and polish the bore.
The whole cycle takes 90–150 seconds on a single-head machine with a coil car, and most of that is the alignment step. Operators who skip the alignment step because the coil "went on fine last time" are the same operators who report mysterious bore damage.
A note on the sequence that surprises people: the grip check at step six is the one step that separates a line that runs for a year without a coil-handling incident from one that has a near-miss every few months. It costs almost nothing to add to the standard operating procedure.
Four questions come up every time I take an operator through this sequence, and the answers are the difference between a check that gets done and a check that gets skipped.
How tight should the mandrel be before I release the coil car?
On a hydraulic mandrel, bring the unit up to its set pressure and leave it on — the machine decides the force, not the operator. On a mechanical screw mandrel, tighten until the coil will not turn by hand, then a quarter turn more. Beyond that you are not adding grip, you are adding stress to the taper and the segments.
Can I load a coil with a damaged bore?
You can, but expect the mandrel to carry the load on two segments instead of four. That halves the available friction and puts a bending moment into the drum. If the bore is oval by more than about 5 mm across the diameter, either dress the bore or run the coil on a reel that supports it from outside rather than on a mandrel.
Why does the mandrel slip in the afternoon but not in the morning?
Warm hydraulic oil is thinner, so internal leakage past the seals rises and the pressure that reaches the expansion cylinder falls. Fit a gauge to the mandrel circuit and log the reading at the start and end of a shift. If it drops more than about 10%, the seals are due for replacement — and the slipping will get steadily worse until they are.
Do I need a different mandrel for 610 mm bores?
Only if you run them regularly. A machined sleeve with full-length contact across the segment faces works well for occasional 610 mm coils. A short spacer ring does not — it concentrates the load on a narrow band, distorts the coil eye, and produces exactly the kind of oval bore that causes trouble on the next coil.
How often should the segments be inspected?
Every 500 operating hours, or quarterly on a single-shift line. Collapse the mandrel fully and measure the collapsed diameter at each segment; more than 2 mm of variation between segments means debris is packed underneath or the taper is worn. At the same inspection, look at the segment faces for polishing — a mirror finish on the contact face is a sign the friction coefficient has fallen.
Reading Grip From How the Machine Behaves
You do not need instrumentation to tell whether a mandrel is gripping properly. The machine tells you, if you know which behaviour maps to which cause.
| What you observe | What it usually means | How to confirm |
|---|---|---|
| Coil turns on the mandrel when the brake engages | Oil or rust film on the bore; friction coefficient fallen below about 0.10 | Wipe the bore with a rag and re-run. If grip returns, the film is the cause |
| Slipping only on heavy coils, fine on light ones | Insufficient contact area — bore oval, or coil not centred | Measure bore diameter at four positions 90° apart |
| Slipping that worsens through the shift | Hydraulic pressure decaying: seal leak, warm oil, or a relief valve drifting | Fit a gauge to the mandrel circuit and log pressure at start and end of shift |
| Scoring inside the bore after removal | Segment edges proud, packed debris under segments, or forced loading | Collapse fully and measure the collapsed diameter at each segment |
| Coil wobbles as it rotates | Bore not concentric with the outer diameter, or mandrel bearing wear | Dial-indicate the mandrel face; if runout exceeds 0.3 mm, inspect the bearing |
| Expansion is slow or incomplete | Air in the hydraulic circuit, low oil level, or a sticking segment | Cycle the mandrel unloaded five times and watch travel at each segment |
The first row is the one worth acting on fastest. An oil film on the bore drops the friction coefficient from around 0.20 to 0.08–0.10, which cuts the available holding torque by more than half. A coil that ran cleanly on Monday can slip on Tuesday with nothing changed except how the coil was stored.
The third row is the one that gets misdiagnosed most often. A hydraulic mandrel that holds pressure perfectly at 9 a.m. and slips at 3 p.m. is usually losing pressure through a warm seal, not losing grip through wear. Fitting a USD 40 gauge and writing the reading in the shift log will settle the question in two days and save a mandrel rebuild.
Where Mandrel Grip Fails in Practice
Five failure patterns account for nearly every slip I have investigated, and only one of them is a hydraulic problem.
- Bore contamination. Storage under a leaking roof, a coil stored outdoors, or a coil that sat in a wet truck all leave rust or an oil film on the bore. Wiping the bore before loading is a ten-second habit that prevents most of it.
- Worn or polished segment faces. Over years the segment faces work-harden and polish, and the friction coefficient falls with them. A mandrel that gripped 12-tonne coils for a decade may not grip them in year eleven. Re-machining or replacing the segments restores it.
- Oval or damaged bores. Coils that have been dropped, crushed, or stored on their side for a long period lose bore roundness. A mandrel cannot make contact where the bore has moved away from it, and no amount of pressure closes the gap.
- Mixed bore sizes without an adapter. Running 610 mm bores on a 508 mm mandrel with a sleeve, or the reverse, works only if the adapter is a proper machined sleeve with full-length contact. A short spacer ring concentrates the load and distorts the coil eye.
- Brake set too high for the coil. A brake torque that suits a 1,250 mm outer diameter is excessive on the same strip when the coil has paid down to 700 mm. If the brake is set by hand once per coil rather than automatically, this is where coils start slipping — and it is a control problem, not a mandrel problem.
That last point deserves a sentence of its own, because it is the one that gets blamed on the mandrel most often. Braking torque is set to hold back tension. Back tension for a given strip tension rises as the coil diameter falls. A fixed brake setting therefore produces increasing tension as the coil pays down, and eventually the demand exceeds what the friction joint can hold. If a coil slips only in its last third, measure the back tension before you touch the mandrel.
What to Check Before Every Coil Change
A five-point check that takes under a minute and covers everything the failure patterns above need.
One — bore condition. Light into the eye, looking for rust, oil or deformation in the first wrap. Wipe if needed.
Two — collapsed diameter. Confirm the segments are fully retracted. If your machine has no gauge, paint a witness mark on the drum and a matching mark on each segment so a glance tells you the position.
Three — hydraulic pressure. Read the gauge on the mandrel circuit at the start of the shift, and write it down. The value matters less than the trend across a week.
Four — car alignment. Bring the car up to the mandrel with the coil, and check the gap at top and bottom of the bore with a finger or a feeler. The coil should slide on without a push.
Five — grip test with the car still under the coil. Jog against the brake and watch for relative movement. This is the one step that catches a problem before it becomes an incident.
On a machine that runs the same coil size all day, the check takes 20 seconds. On a job shop that changes coil every hour, it takes closer to 90. Either way it is cheaper than a coil that rotates on the mandrel at full speed, which damages the bore, scores the segments and usually scraps the outer wraps of the coil as well.
FANTY has been building coil-handling equipment for 12 years with a team of 370 people, and the machines on our floor are tested with a loaded grip test before shipment precisely because it is the step customers skip. A mandrel is a simple device with a generous margin. It fails when the bore it is gripping has changed, and the bore is the part nobody inspects — which is why the grip test and the bore check earn their place on the standard operating procedure of every line we ship.
If you are choosing between a mandrel and a reel for a mixed coil programme, the deciding factor is bore consistency rather than coil weight. A mandrel-type uncoiler is the better choice when most of your coils arrive at a consistent bore from a mill you trust. If your coils come from a dozen sources with bores that vary by 15 mm and arrive oval, a reel that supports the coil from outside is the more forgiving machine — and no amount of mandrel pressure will compensate for a bore that has been crushed.
Coil Slipping on the Mandrel? Let's Look at the Grip, Not the Pressure
Send us your coil weight, bore size, brake torque setting and the point in the coil where slipping starts. We will tell you whether the mandrel, the brake control or the coil itself is the limiting factor.
Send Us Your Coil Data