How to Install a Coil Feed Line with Uncoiler?
- Share
- Issue Time
- Nov 7,2025
Summary
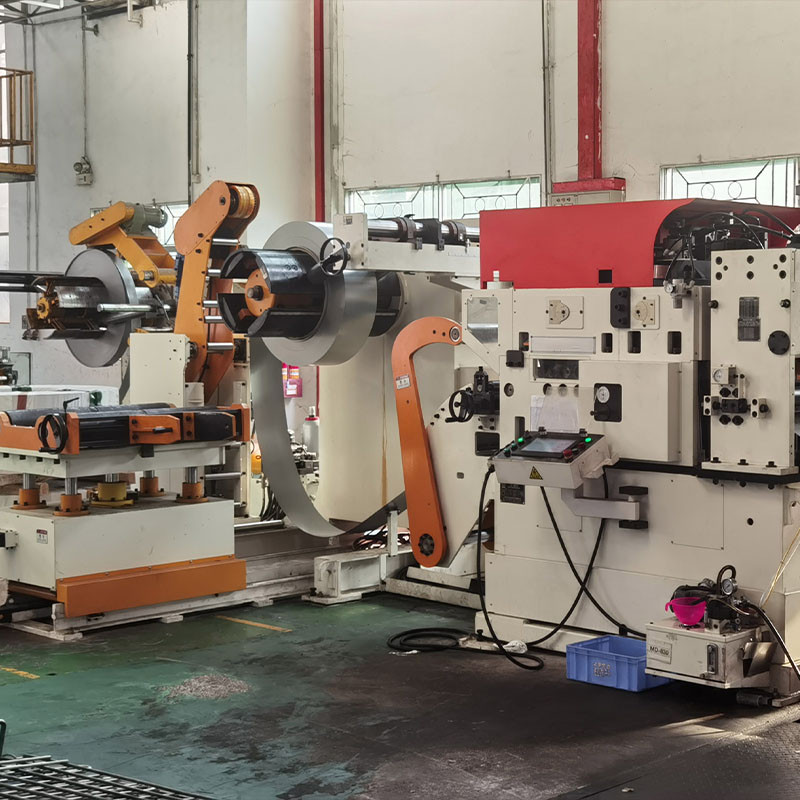
Need help setting up a coil feed line with uncoiler for your stamping operations? This hands-on guide covers foundation prep, electrical hookup, and safety checks, with pro tips.

Look, I've lost count of the times I've rolled up my sleeves on a factory floor, wrestling a new coil feed line into place while the boss hovers, wondering why the uncoiler isn't spinning yet. After 15 years tweaking these setups—from cramped fab shops to sprawling auto plants—I've learned one thing: A botched install can turn your stamping line into a money pit faster than a jammed feeder. But get it right, and you're looking at smoother coils, fewer headaches, and output that actually hits quota.
In this no-nonsense walkthrough, I'll walk you through installing a coil feed line with uncoiler like it's just another Tuesday. Pulled from real-world jobs and fresh 2025 tweaks (think servo upgrades for EV runs), we'll cover the basics to the gotchas. And yeah, I'll flag why Fanty's plug-and-play systems have cut my install times in half—because who needs a week-long ordeal? Grab your torque wrench; let's make your line hum.
Prep Work: Don't Skip the Foundation (Literally)
Before you uncrate that uncoiler, scout your space like you're prepping for a marathon. The whole coil feed line—decoiler, straightener, feeder—needs a rock-solid base to handle vibrations from 20-ton coils unwinding at 30m/min. Aim for a reinforced concrete pad weighing 8-10 times the machine's heft (say, 5-8 tons for a mid-range setup).
Pro tip from the trenches: Leave 1-2 meters clearance around the uncoiler for coil cars and maintenance access. In 2025, with more lines going modular, factor in expansion room for IoT add-ons.
Step 1: Unboxing and Component Alignment
- Position the Uncoiler: Hoist the hydraulic uncoiler onto its pad using a crane rated for double the weight—cradle-style bases make loading coils a breeze later.
Align the mandrel horizontally; a laser level here saves hours of shimming. - Mount the Straightener and Feeder: Bolt the straightener downstream (9-11 rolls for flatness under 0.2mm), then the NC servo feeder last—ensure the loop control sensors face the uncoiler for tension feedback.
- Connect the Loop Arm: This dance floor between uncoiler and straightener prevents slack—adjust its height to match your coil OD (up to 2,000mm).
Step 2: Electrical and Pneumatic Hookups—Where It Gets Tricky
Power's the lifeblood: Wire to a 380V three-phase supply with dedicated breakers—servo feeders guzzle amps, so oversize by 20%.
In 2025 setups, integrate Ethernet for PLC comms; it's a game-changer for syncing with your press without constant tweaks.

Step 3: Loading, Testing, and Fine-Tuning Your Line
- Load a Test Coil: Use a coil car to position (center it with side guides), expand the mandrel hydraulically, and thread the strip via the wedge—pull from the top for stability.
- Run Initial Cycles: Power on, adjust loop sensors for 300-500mm sag, and jog the feeder at low speed—watch for wrinkles or slippage.
- Calibrate and Debug: Dial in tension (via PLC for auto modes), test emergency stops, and ramp to full speed—aim for <0.05mm feed accuracy on pilots.
Troubleshoot early: If the uncoiler stalls, check hydraulic fluid levels—low pressure's a killer I've fixed mid-shift more than once.
Why Fanty Makes This Install a Whole Lot Easier
Here's the part where I get a little biased from experience: After wrangling finicky lines for years, switching to Fanty's integrated coil feed lines felt like cheating. Their hydraulic uncoilers come pre-wired with modular plugs—hook up in hours, not days—and the built-in diagnostics flag issues before you hit "start." With a 45,000㎡ factory and 370 pros since 2013, Fanty's setups (like their 3-in-1 decoiler-straightener-feeder) have shaved 40% off my install timelines in auto fabs, plus free on-site training that turns green techs into pros. If you're dreading the grunt work, their global exports (U.S. compliant since 2018) are your shortcut to uptime.
Wrapping Up: Fire It Up and Keep It Running
Installing a coil feed line with uncoiler boils down to solid prep, careful connections, and a test run that catches the gremlins early—do it right, and your stamping output sings. I've turned lemons into lemonade on more lines than I care to admit, but starting with quality gear like Fanty's? That's the real hack. Got a curveball in your setup? Hit the comments—I've got stories (and solutions) from the floor.
Overwhelmed by the install? Let's simplify. Reach out to Fanty for guided coil feed setup support. Get your line live faster!
By Alex Rivera, Factory Floor Vet & Setup Specialist | November 7, 2025