How to Thread a Coil Through an NC Straightener Feeder?
- Share
- publisher
- David Park - Senior Stamping Engineer, FANTY Machinery
- Issue Time
- Oct 9,2026
Summary
Thread-up on an NC straightener feeder takes six to ten minutes when every gap is open and the strip end is dressed, and much longer when it is not. This guide sets out the five pre-checks, the coil opening sequence, how to feed strip through the straightener without marks, starting values for gap, penetration and pass line, and the five mistakes that cost a full coil.
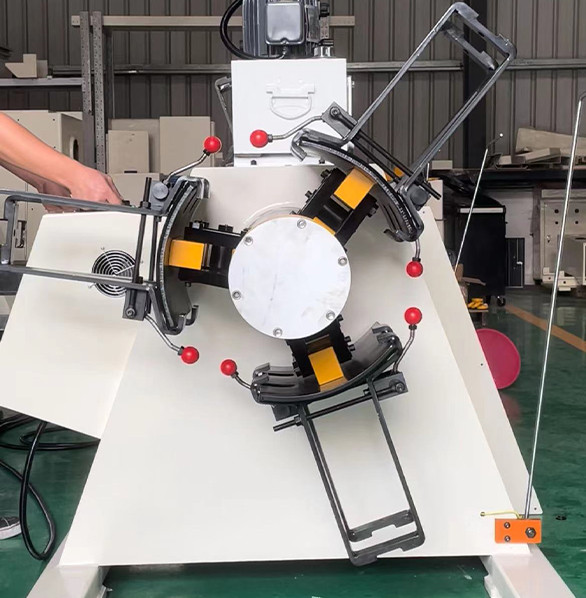
Threading a coil takes eight minutes when the line is ready and forty minutes when it is not. The difference is almost always decided before the strip reaches the rolls.
Most roll damage, most first-piece scrap and most of the marking complaints we investigate trace back to a thread-up done at production speed with the gaps closed.
This is the sequence we teach on an NC straightener feeder, in the order the operator actually performs it.

Nothing in this procedure is difficult. What makes it work is doing the checks in order, because a check skipped early becomes a fault found late.
Before You Touch the Coil: Five Checks
Five minutes here prevents the two failures that cost the most: a coil that walks on the mandrel and a strip end that whips.
- Coil bore against mandrel range. A 508 mm bore coil on a mandrel expanded for 610 mm will not grip evenly.
- Coil weight against rated capacity. Overloading shows up later as mandrel creep, not as a loading failure.
- Mandrel fully expanded. Confirm hydraulic pressure at the gauge, not by ear.
- Entry guide set to strip width. One to two millimetres of clearance, not five.
- Roll gaps opened. Every straightening and feed gap open before the strip moves.
The last check is the one that gets skipped. A strip pushed into closed rolls is how a roll face gets a burr that marks every coil afterwards.
Do the checks with the line isolated. A thread-up performed while somebody else is at the control panel is how hands end up between rolls.
Confirm the die is open and the press is at bottom dead centre clearance before the strip reaches the first station.
Opening the Coil Without Damaging the Inner Wrap
Cut the binding band with the coil on the mandrel and the hold-down in contact. Releasing a band on a free-standing coil is how a coil unwinds across a floor.
Use the peeler to lift the outer wrap, then let it down onto the hold-down. The first wrap should be controlled, not released.
Inspect the strip end. A mill shear burr or a damaged leading edge will scratch every roll it touches on the way through.
Deburr the end with a file or a flap disc before threading. Thirty seconds of dressing saves a roll surface.
Feeding the Strip Through the Straightener Without Marks
Thread at jog speed, three to six metres a minute, and never at production speed.
Bring the strip to the entry guide, check that both edges are inside the guide, then jog it forward until it appears at the first roll pair.
Once the strip is through the straightener, jog until it reaches the feed rolls, then close the feed clamp at the correct gap.
Only after the strip is through both sections do you close the straightening gaps and set the penetration. Setting gaps around a moving strip is how rolls get damaged.
Watch the strip at the entry guide while it moves. A strip that rides up one side of the guide will track off centre all the way to the die.
Stop and correct it there rather than at the die. Correcting lateral position at the die costs a strip; correcting it at the guide costs ten seconds.
Setting the First Piece: Gap, Penetration and Pass Line
Three settings decide whether the first strip is usable. The table gives the starting values we use on a seven-roll machine.
| Setting | Starting Value | Where It Costs You If It Is Wrong |
|---|---|---|
| Straightening roll gap | 0.9 to 1.0 times strip thickness | Too tight marks the strip and loads the drive; too loose leaves coil set in the material |
| Feed roll gap | Thickness plus 0.05 to 0.10 mm | Too tight flattens the strip edge; too loose slips and costs feed length |
| Pass line height | Level with the die entry, within ±0.5 mm | A step at the die entry drags one edge and skews the strip in the first stations |
| Entry guide clearance | 1 to 2 mm total | Wide guides let the strip wander; tight guides scrape the edge and cause galling |
| Hold-down pressure | Enough to stop wrap spring-back | Too little lets wraps slap; too much marks the coil face on coated stock |
Expect two to three strips of scrap while the settings settle. Budgeting for that is cheaper than trying to get a good panel out of strip number one.
Check the first good piece for flatness, feed length and hole position before releasing the line to production.
Record the settings that produced that piece. The next coil change starts from a written number instead of an operator's memory.
On a 0.8 mm job the difference between a good first panel and a scrapped one is often 0.05 mm of roll gap.
The Mistakes That Cost a Full Coil
Five habits show up again and again in thread-up reports, and each one has a measurable cost.
| Mistake | What Happens | What It Costs |
|---|---|---|
| Threading with the gaps closed | The strip end catches on the roll face and burrs it | A marked roll surface on every subsequent coil until the roll is re-ground |
| Skipping the end deburr | A sharp leading edge scrapes along the rolls and the guide | Scratches on the first few metres, and edge galling in the guide |
| Guides set wide "to be safe" | The strip wanders laterally on the way to the die | Off-centre holes and scrap that gets blamed on the die |
| Running production speed on the first strip | There is no time to react when the strip skews | A bent strip end, sometimes a damaged guide, and a stopped line |
| Leaving the hold-down off after threading | Wraps spring as the coil empties | Unstable payoff tension and a loose coil at the end of the run |
Every row in that table is a procedure problem, not an equipment problem. That is why they are cheap to eliminate.
Write the sequence down and laminate it at the control panel. Operators change shifts; a memorised procedure does not survive a handover.
Review it whenever the strip specification changes. A sequence tuned for 1.2 mm mild steel is not the right one for 0.6 mm coated stock.
Where Threading Procedure Cannot Protect You
A disciplined thread-up removes operator-caused damage. It cannot remove the faults that arrive with the material or sit in the machine.
Coil set in the material. If the coil was wound or slit badly, the straightener will reduce the set but the flatness still may not meet spec. That is a material decision.
Four faults sit outside the procedure entirely, and knowing them stops a good operator from being blamed for them.
- Worn rolls. Once a roll face has a burr or a flat, a careful thread-up still produces marks. The fix is re-grinding, not technique.
- Misaligned die or bolster. If the die entry is not square to the pass line, no amount of guide setting will keep the strip straight.
- Wrong strip width for the guide range. Guides cannot be closed below the width they were built for, and forcing them damages the strip edge.
- A coil end that was already damaged. A bent or folded leading edge cannot be threaded cleanly, whatever the procedure says.
None of those faults are visible during a thread-up. They appear as a flatness or position problem on the first good panel, which is why the first-piece check matters.
If the first panel is good and the tenth is not, the cause is in the coil or the settings rather than the thread-up.
Our lines ship with a CE-marked electrical package and a thread-up procedure in the manual, and we commission them in more than 60 export markets.
The settings above are starting points; the geometry behind them is set out in the 3-in-1 decoiler straightener feeder guide to roll count, pitch, gap and penetration.
For machine capacities and guide ranges, the coil line product index lists what each frame size accepts.
How long should a thread-up take on a 1,300 mm NC straightener feeder?
Six to ten minutes from a loaded coil to the first good panel, once the operator knows the sequence. Forty minutes is common when the gaps were left closed.
At what jog speed should you thread 1.0 mm strip?
Three to six metres a minute. Above that there is not enough reaction time when the strip meets the guide or the rolls.
How many strips of scrap should a coil change produce?
Two to three on a stable job. More than five means a setting is wrong rather than still settling.
Does the straightening gap need to be closed before or after threading?
After. Thread with every gap open, then close the straightening rolls to 0.9 to 1.0 times thickness with the strip stationary.
Where to go next
This article sits in the straightener branch of the coil line guide library, one layer below the flatness pillar. It covers the procedure that puts a coil on the line rather than the geometry that flattens it.
Read the flatness specification guide