How Do You Hit a Flatness Spec on a Coil Line? Roll Count, Pitch, Gap and Penetration
- Share
- publisher
- David Park - Senior Stamping Engineer, FANTY Machinery
- Issue Time
- Sep 18,2026
Summary
Flatness is the one straightener output nobody puts a number on until the reject bin fills up. This guide works from the I-unit target backwards: the seven settings that decide flatness, which of them are bought rather than adjusted, how many rolls a thickness and grade actually needs, how penetration should be distributed, and where common setup mistakes show up on the balance sheet later.
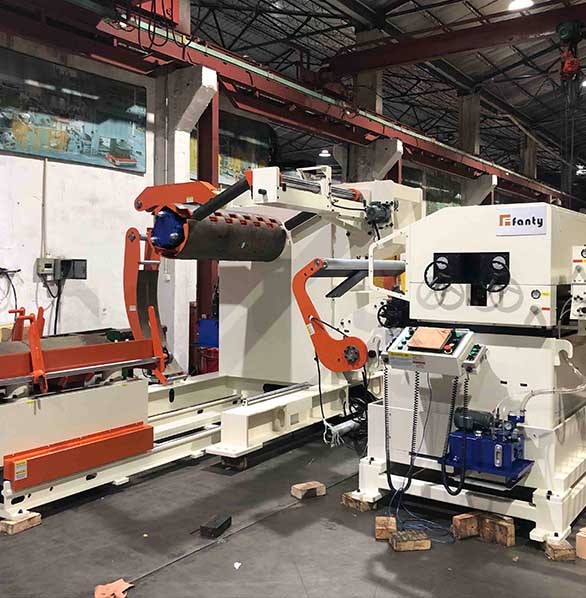
Flatness is the one straightener output nobody puts a number on until the reject bin fills up. Buyers specify tonnage, width and line speed carefully, then leave the actual flatness target as a phrase: "good enough for our panel." That phrase is not a specification, and a straightener cannot be set to it.
This guide works the other way round. It starts from the flatness target, converts it into the handful of roll settings that control it, and shows where each setting stops being adjustable and starts being a machine capability you should have bought.
It is the sequence we run through whenever a customer sends strip samples with visible camber, edge wave or a centre buckle, and it applies to any NC straightener feeder regardless of who built it.
On this page
- 01 Start with the flatness spec, not the machine
- 02 The settings that actually decide flatness
- 03 How many rolls you actually need
- 04 Roll diameter, pitch and the geometry trap
- 05 Setting roll gap from strip thickness
- 06 Roll penetration and how it is distributed
- 07 Pass line height and back tension
- 08 Matching settings to yield strength
- 09 Defect, cause and correction matrix
- 10 Where straightening setup goes wrong
- 11 Verifying flatness at the machine
- 12 Straightening knowledge base
- 13 Frequently asked questions
Start With the Flatness Spec, Not the Machine
A straightener is judged against a flatness figure, and flatness is normally expressed in I-units. One I-unit is a deviation of one micrometre over a one-metre length, which is a steepness, not a height. Strip at 5 I looks flat in the hand.
The reason the unit matters is that a straightener does not remove curvature, it trades large curvature for small curvature spread over many rolls. If you state a target as "flat" you have no way of knowing whether the machine in front of you has one more useful adjustment left or none.
| How the spec is written | What it actually measures | Where it lets you down |
|---|---|---|
| "No visible waviness" | Whatever the inspector can see under the lighting on the day | Fails on a dark shift, fails after repainting, and gives a fitter nothing to adjust towards |
| I-units over a sample length | Steepness of the residual distortion, measured over a known span | Needs a defined span and a defined measuring light. Quoting "10 I" without either is still not a spec |
| mm/m of bow or camber | Height of the arc across a fixed length of strip | Covers long-form bow well, but says nothing about short-pitch edge ripple that shows up later in a flat panel |
| "Fit for exposed panels" | An end-use outcome, not a measured value | Useful as the goal, useless as a setup target because it cannot be checked at the machine |
| Flatness after the press | The combined error of straightener, feed and die | Punishes the straightener for a press problem, and sends fitters chasing the wrong adjustment |
Before anyone touches a handwheel, five values belong on a single sheet of paper: the flatness figure and the span it is measured over, the material grade and yield strength, the thickness range you actually run rather than the nominal, the strip width, and where in the line the check happens. Everything later in this article is downstream of those five.
- The number and its span. "8 I over 1 m" is actionable. "8 I" is not, because the same physical wave reads differently over 500 mm and over 2 m.
- Yield strength, not just grade name. Two coils both described as "high tensile" can sit 150 MPa apart, and that gap moves the penetration setting more than a full roll of adjustment.
- The real thickness range. If the line runs 0.8 mm to 3.0 mm, the straightener is being asked to work two different machines. Settings that suit one end will mark or under-work the other.
- Strip width. Width sets how much of the distortion is edge-driven. Narrow strip tolerates settings that would ripple a 1,250 mm coil.
- Where the check happens. Flatness measured at the straightener exit and flatness measured after the feed rolls and the die are two different numbers, and the second one is always worse.

The Settings That Actually Decide Flatness
Seven things influence what comes out of the straightener. Two of them are bought, five are set. Confusing the two is the most common reason a line that used to run flat stops running flat after a job change.
| Setting | What it controls | Bought or set | How sensitive it is |
|---|---|---|---|
| Roll count | How many bending reversals the strip receives | Bought | Not adjustable at all. It is a ceiling, and it caps the flatness you can ever reach |
| Roll diameter | Radius of each bend, and therefore the strain per pass | Bought | Small rolls bend strip harder per pass. That helps thin gauge and hurts thick gauge |
| Roll pitch | Spacing between adjacent roll centres | Bought | Very sensitive. Pitch that is too tight leaves no room for penetration |
| Roll gap | The clearance the strip passes through | Set | The most misused adjustment. Too tight feels productive and marks the strip |
| Roll penetration | How far each roll pushes past the strip's neutral line | Set | The adjustment that does the real work, and the one that needs a distribution rather than a single value |
| Pass line height | Entry and exit height of the strip through the roll stack | Set | Moderate, but a wrong pass line builds a bow into strip that was flat when it arrived |
| Back tension | Resistance from the decoiler brake before the strip enters | Set | Low sensitivity alone, high sensitivity in combination with penetration |
How Many Rolls You Actually Need
Roll count is the single most consequential decision and the one buyers shop on hardest, because it is visible on a specification sheet and it moves the price. The rule behind it is straightforward: each pass through a roll reverses the bending direction, and every reversal removes some of the residual curvature. More reversals, flatter strip.
The catch is that the return per roll falls away quickly. Going from five rolls to seven buys a large improvement. Going from eleven to thirteen buys a small one, and costs you a longer machine, more drive power and a harder threading job.
| Roll count | What it handles well | Where it runs out | What the extra money buys |
|---|---|---|---|
| 5 rolls | Light gauge, mild steel, loose flatness targets, short runs | Runs out of bends on anything above roughly 2 mm or on high yield material | Lowest cost and the fastest to thread. Fine for non-exposed parts |
| 7 rolls | The workhorse range. Mild and semi-hard steel up to about 3 mm at moderate widths | Struggles when the flatness target tightens below roughly 10 I, or when yield climbs past 350 MPa | A real step up in flatness per roll. The point where most general press shops should sit |
| 9 rolls | Thicker gauge, high yield steel, visible panel work | Needs consistent coil quality. Poor incoming camber still shows through | Enough reversals to work HSLA grades without cracking them |
| 11 rolls | Exposed automotive panels, tight I-unit targets, mixed grades | Becomes sensitive to roll alignment and bearing wear. Maintenance discipline starts to matter more than roll count | Reserve capacity for the day the material supply changes |
| 13 rolls and above | Precision levelling, thin high-strength strip, very tight targets | Long machine, higher drive power, slower threading, and it will not fix bad incoming coil | Diminishing returns unless the target genuinely demands it |
Two practical warnings. First, roll count cannot be added later, so if the flatness target is close to the machine's limit, the honest answer is a different machine rather than a better setup. Second, a high roll count does not compensate for a bad roll pitch, which is the next subject and the one that catches buyers who compare specifications line by line.
Roll Diameter, Pitch and the Geometry Trap
Roll pitch is the centre-to-centre distance between adjacent rolls. It matters because rolls have to overlap or nearly overlap to bend the strip, and two rolls of a given diameter cannot sit closer together than their own diameter without colliding.
Roll diameter then sets how hard each bend is. Thin strip needs a small bend radius to be worked at all, because the strain a roll imposes is proportional to thickness divided by radius. A 60 mm roll bends 0.5 mm strip properly and barely touches 4 mm strip.
| Strip thickness | Typical roll diameter | Implication for pitch | What breaks if it is wrong |
|---|---|---|---|
| 0.3 to 1.0 mm | Small, often 40 to 60 mm | Pitch can be short, so many rolls fit in a compact body | Rolls too large simply skate over the strip. Penetration goes in and nothing changes at the exit |
| 1.0 to 2.5 mm | Medium, around 60 to 90 mm | The mainstream compromise between bend radius and machine length | Too short a pitch leaves no adjustment travel, so the last few rolls cannot contribute |
| 2.5 to 4.5 mm | Large, 90 to 140 mm | Pitch must grow with diameter, so the machine gets long | Undersized rolls deflect under load and the flatness drifts as the coil runs down |
| Above 4.5 mm | Large and heavily supported | Usually a leveller rather than a straightener feeder | A three-in-one machine stretched to this gauge loses the compactness that made it worth buying |
The trap is that two machines can both be described as "nine-roll" and behave completely differently, because one has 90 mm rolls on a long pitch and the other has 60 mm rolls packed tight. If you are comparing quotations, ask for roll diameter and roll pitch alongside the roll count. A supplier who cannot quote those two numbers is quoting a category, not a machine.
Setting Roll Gap From Strip Thickness
Roll gap is the clearance between the upper and lower roll sets. It is the first thing a new operator reaches for, and the setting most often left too tight. Tightening the gap feels like doing more work because the machine sounds busier and the ammeter climbs.
A workable starting point for a fresh job is the nominal strip thickness, then remove a small amount and close up in steps while watching the exit strip rather than the load meter. The exact figure depends on roll diameter, so treat the numbers below as orientation and confirm them against the strip in front of you.
| Material | Starting gap | Adjustment direction | First symptom of going wrong |
|---|---|---|---|
| Mild steel, SPCC or DC01 | Close to nominal thickness, slightly under | Close up in small steps until the bow disappears, then back off a quarter turn | Surface marking and a bright polish line down the strip |
| Semi-hard steel, SPHC | Modestly under nominal | Close up more gradually, and expect to need more penetration rather than a tighter gap | Roll load climbs faster than flatness improves |
| HSLA 340 to 550 | Near nominal, do not over-tighten | Bias towards penetration and roll count instead of gap | Edge cracking and a dull, over-worked surface finish |
| Stainless 304 | At or just under nominal | Work with light contact. Stainless work-hardens under repeated pinching | Strip gets harder as it runs, and later passes stop having an effect |
| Aluminium 5052 or similar | Near nominal | Prefer fewer, gentler passes. Soft alloys mark easily | Roll pickup and transfer marks that then print through the die |
| Pre-painted or coated strip | At nominal, never below | Use penetration and pass line, never gap, to do the work | Coating scuffing that cannot be adjusted out and becomes a reject |
Roll Penetration and How It Is Distributed
Penetration is how far a roll pushes past the strip's neutral line, expressed as a depth or as a percentage of the roll's adjustment range. It is the setting that does the actual straightening work, and it is the one most often reduced to a single number when it should be a pattern.
On a multi-roll straightener the penetration is not uniform. The entry rolls take the strip's incoming curvature and need the most work. The middle rolls continue the reversal. The exit rolls are doing a much lighter job, mostly relaxing the bend the previous roll left behind.
If all rolls are set to the same depth, the strip leaves the last roll with a residual curl in the direction of that final bend, which is why operators end up with strip that is flat in the middle and curled at the tail.
| Penetration pattern | Effect on the strip | Where it stops working |
|---|---|---|
| Entry rolls deepest, falling towards the exit | The standard arrangement. Incoming curvature is flattened early and the exit rolls relax it | Needs enough rolls to hold the gradient. On a five-roll machine there is little room to taper |
| Uniform across all rolls | Easy to set and repeat, and works acceptably at loose flatness targets | Leaves a residual curl at the exit matched to the last roll's direction |
| Decreasing then slightly increased at the last roll | Used to fine-tune a stubborn long bow that survives the main taper | Easy to overdo. A small error here reintroduces the defect you just removed |
| Heavy penetration across the board | Flattens aggressively, and hides a wrong pass line | Over-works the surface, consumes drive power, and can crack high yield or stainless strip |
| Very light penetration across the board | Leaves the machine essentially acting as a guide | The strip passes through unchanged. Operators then tighten the gap, which is the wrong correction |
The practical check is to look at the exit strip immediately after the straightener, before the feed rolls touch it, and then look again at the tail of the coil. If the head is flat and the tail curls, the penetration gradient is wrong rather than the overall depth.
If both head and tail curl in the same direction, the last roll is doing too much work and the pass line is the next thing to examine.

Pass Line Height and Back Tension
The pass line is the height at which the strip travels through the roll stack. It has to line up with two things at once: the height the strip leaves the decoiler at, and the height the feed rolls or the die want to receive it at.
Pass line errors are quiet. Nothing alarms, nothing looks broken, and the machine simply needs more penetration than the specification suggested to reach the same flatness. That extra penetration then costs drive power and roll wear for the life of the job.
| Symptom | Likely pass line or tension cause | Correction | The cost of leaving it |
|---|---|---|---|
| Persistent long bow in one direction | Entry height does not match the coil pay-off height | Set the entry guide height to the natural pay-off line before touching roll settings | Every job on the line needs extra penetration, so power and roll wear are permanently above what was quoted |
| Strip snakes from side to side at the entry | Combination of low back tension and a pass line that lets the strip wander | Raise brake tension slightly and re-check the entry guide clearance | Edge damage and guide wear, and a coil that will not track straight through the feed rolls |
| Loop collapses between decoiler and straightener | Back tension too low for the line speed | Increase decoiler brake torque, or slow the acceleration ramp | The strip hits the floor, picks up grit, and that grit prints through the die as a defect |
| Coil is pulled off the mandrel rather than unwound | Back tension higher than the decoiler brake can hold smoothly | Reduce brake torque and let the straightener do the work | Coil slip and mandrel wear, which is the subject of the companion guide on how a decoiler mandrel grips a coil |
| Flatness good at low speed, worse at full speed | Tension control responds faster than the straightener setting can absorb | Add acceleration ramp and check whether the loop control is hunting | You lose the top of the speed range, and the line runs below the throughput it was bought for |
Matching Settings to Yield Strength and Grade
Yield strength is what makes a straightener either work well or work hard. A higher yield material resists bending, so it needs more penetration to be straightened, and it springs back further once the rolls release it.
The consequence is that settings do not transfer between grades. A recipe that produces flat SPCC will under-work HSLA 420 in the same thickness and leave it bowed, and a recipe that flattens HSLA 420 will over-work and mark SPCC. If a line runs a mixed coil diet, the practical answer is a written recipe per grade rather than an operator's memory.
| Material class | Typical thickness | Setting implication | Cost when the setting is copied from a softer grade |
|---|---|---|---|
| Mild steel, 200 to 250 MPa | 0.5 to 3.0 mm | Moderate penetration, fewest rolls needed, forgiving of small errors | Little. This grade tolerates a recipe borrowed from almost anywhere |
| Semi-hard, 300 to 350 MPa | 0.8 to 3.0 mm | More penetration and a slightly wider gap than mild steel | Residual bow that shows up as a leaning part after the press, traced late to the straightener |
| HSLA 340 to 420 | 1.0 to 4.0 mm | Needs roll count and penetration reserve. Gap stays near nominal | Under-worked strip, plus a temptation to close the gap, which cracks edges instead of flattening |
| HSLA 550 and above | 1.5 to 5.0 mm | Treat as a different process. Expect to reduce line speed and monitor roll load | Roll surface damage and edge cracks that only appear after forming |
| Stainless 304 | 0.5 to 3.0 mm | Light contact, more passes, avoid repeated pinching because the material work-hardens | Each subsequent pass does less, and the operator keeps adding penetration to no effect |
| Aluminium, 5052 or 3003 | 0.5 to 3.0 mm | Gentle settings, clean rolls, attention to surface finish above flatness | Roll pickup marks that transfer through the die and become the defect that matters |
One more variable sits underneath all of these: incoming coil quality. Straightening removes curvature that the coil supplier created and that your own coil handling may have added. If the coil arrives with real crossbow or a heavily cambered edge, the straightener will correct what it can and pass the rest downstream.
That is why coil telescoping and edge damage in the warehouse end up as flatness complaints at the press.
Defect, Cause and Correction Matrix
Most flatness problems arrive with a name already attached, usually because a previous operator had the same shape and called it something. The value of a matrix is that it forces the diagnosis back to a cause before anyone reaches for a handwheel, because the same visible shape can come from three very different places.
| Defect | What you see | Most likely cause | First correction | When it is not a straightener problem |
|---|---|---|---|---|
| Camber | The strip curves sideways as it leaves, so the coil wanders across the line | Thickness or yield variation across the strip width, or edge damage on one side | Check the strip across the width and correct the pass line and entry guide before roll settings | If one edge measures consistently thicker, the straightener cannot fix a coil that was rolled unevenly |
| Edge wave or edge ripple | Short-pitch waves running along one or both edges | Edges are being elongated more than the centre, usually because the gap is too tight at the edge | Open the gap slightly and increase penetration so bending rather than pinching does the work | A wave that survives a full penetration taper is usually incoming material, not setup |
| Centre buckle | Waves running down the middle of the strip with flat edges | Centre is longer than the edges after rolling, and the straightener is not working the centre hard enough | Add penetration and check that the rolls are parallel across the face | Roll parallelism drift is mechanical. A worn bearing will produce the same shape and no setting will hold |
| Crossbow | The strip is curved across its width, like a shallow channel | Uneven reduction during rolling, and often a pass line that is off centre | Confirm entry and exit heights are level, then work the bow out gradually over more rolls | Heavy crossbow can need a dedicated leveller. It is difficult to remove with a straightener alone |
| Twist | The strip rotates about its own axis along its length | Asymmetric residual stress, frequently combined with camber | Correct camber first. Twist usually reduces on its own once camber does | Twist that persists after camber is gone points to a coil defect or a badly set entry guide |
| Longitudinal curl | The strip coils up like a spring along its length | Penetration gradient ends too deep at the last roll | Taper the penetration so the final rolls relax rather than bend | A curl that reverses when you flip the strip is a setup issue. One that does not may be material |
| Springback-driven bow | Flat at the straightener, bowed again after the feed rolls or the die | High yield material springs back between the straightener and the forming station | Increase penetration to exceed the elastic limit properly rather than just touching it | If the gap between straightener and die is very long, the strip will bow regardless of settings |
| Diagonal or zig-zag buckles | Waves running at an angle across the strip | Combined longitudinal and transverse stress, usually a gap that is far too tight | Open the gap and rebuild the setting from the penetration side | If it appears immediately on a new coil and vanishes on the next, suspect the coil |
| Roll marking | Bright polish lines or a repeating pattern along the strip | Gap too tight, roll pressure too high, or contaminated rolls | Open the gap, clean the rolls, and check roll surface condition | Pre-painted and mirror-finish stock marks at settings other material tolerates. Coating choice is a machine specification, not a setting |
| Coil break | A line of transverse cracks, often at the coil's tighter bend radius | Too much penetration applied too quickly, or a coil stored in a tight wrap | Reduce penetration on the entry rolls and increase it gradually across the stack | A coil break already in the material cannot be straightened out. It can only be detected before forming |
Two habits make this matrix far more useful in practice. Keep a sample of each defect taped to the machine with the setting written on it, so a new operator can match a shape rather than guess. And when a defect appears, change one thing at a time.
Two adjustments at once may clear the symptom while leaving you with no idea which one worked, which means it cannot be repeated next week.

Where Straightening Setup Goes Wrong
The failures below are the ones we see repeatedly across different customers, different countries and different end products. None of them are exotic. All of them are expensive in a way that does not show up on the same day the mistake is made.
| Mistake | What actually happens | What it costs | How to avoid it |
|---|---|---|---|
| Chasing flatness with the gap | Gap closes, roll load rises, strip gets marked and sometimes cracked, and the wave is still there | Reject coils, roll resurfacing, and a machine running well above its designed load for no benefit | Fix the gap once for the thickness, then work with penetration. Treat the load meter as a warning, not a target |
| Specifying roll count without roll pitch | Two "nine-roll" machines arrive and only one can reach the target because the other has no penetration room | A machine that has to be replaced or worked around for its entire service life | Require roll diameter and roll pitch in every quotation, and compare them, not just the roll count |
| Ignoring the pass line during installation | The line runs, the strip is acceptable, and every job needs more penetration than the setting sheet says | Permanently higher power draw and roll wear, and a machine that never quite hits its quoted flatness | Set entry and exit heights against the real pay-off line as a commissioning step, and record the values |
| Copying a recipe between grades | A setting that flattened SPCC is applied to HSLA 420 and leaves a bow, or is applied in reverse and over-works soft strip | Several coils of suspect material and a quality complaint before anyone suspects the recipe | Hold a written setting sheet per grade and thickness, signed off when it was proven |
| Trusting light angle instead of measurement | Strip looks flat in the workshop and fails inspection under panel lighting | Rework, repaint, or a customer return on an otherwise correct part | Define the measuring span and the lighting in the specification, then check under those conditions |
| Adjusting two things at once | The defect disappears and nobody knows which change fixed it, or whether it will reappear on the next coil | The same problem returns within days and the diagnosis starts from zero | One change, one observation, then record it. Slower for a shift, much faster over a month |
| Blaming the straightener for a die problem | Roll settings are pushed further and further out of range trying to fix a part that is bowing in the press | Roll and bearing wear, plus the real die or feed issue never gets fixed | Measure flatness at the straightener exit and again after forming. If the first is good and the second is not, the straightener is not the cause |
| Buying rolls to fix incoming coil quality | A higher roll count is ordered because the coil supply is inconsistent, and the extra rolls still cannot remove real crossbow | Capital spent on capability that the material problem will still defeat | Fix what the coil supplier delivers first. Straightening is a finishing operation, not a repair operation |
Verifying Flatness at the Machine
You do not need a metrology lab to hold a flatness target, but you do need a repeatable method and a consistent place to stand. Most disputes about flatness come down to two people measuring in two different places under two different lights.
| Method | What it detects | Practical resolution | When it is not enough |
|---|---|---|---|
| Cut sample on a surface plate | Overall bow and any visible wave in a defined length | Good for anything above roughly 5 I in the hand | Cannot see fine ripple and depends heavily on the plate and the lighting |
| Straightedge with feeler gauge | Gap between a straight edge and the strip surface | Down to about 0.05 mm across a 1 m straightedge | Only covers one line across the strip. A wave in the next 50 mm is invisible |
| Shadow or low-angle light check | Short-pitch waves and edge ripple that the eye misses in flat light | Very sensitive, and the fastest field method | Not a number. Two people will disagree unless the light and angle are fixed by procedure |
| String or wire across a cut length | Camber, the side-to-side curve of the strip | Reads camber of a few millimetres over a few metres reliably | Only for camber. Says nothing about longitudinal flatness |
| Five-point thickness check | Thickness variation across the width, which often explains a wave | Enough to prove whether a defect is incoming or generated | Needs a micrometer and discipline. It is skipped far more often than it should be |
| Check after the feed rolls and die | The flatness the part actually has | The number that matters to the customer | It cannot separate straightener error from feed or die error on its own |
Whichever combination you use, write down four things on the setting sheet: the measuring span, the light or plate used, the location in the line, and the person who signed the sample off. That record is what turns a one-off good coil into a repeatable process, and it is what an operator reaches for when a defect appears at two in the morning.
Straightening Knowledge Base
This page covers the setup decisions. The thirty-six guides below go deeper on individual threads: roll geometry and how to set it, what each flatness defect means and how to clear it, how strip behaves under load, and how the straightener fits into the rest of the line. Each one is written for a specific question rather than as background reading.
1. Roll geometry and setup
Roll count, diameter, pitch, gap and penetration. These are the settings that decide how many times the strip is bent, and how hard.
2. Defect diagnosis: cause and fix
Camber, edge wave, centre buckle, crossbow, twist, curl and springback. Each guide starts from the shape and works back to the cause.
3. Strip behaviour and material response
What the strip does under load: flatness, residual stress, coil breaks, die life, and how high-strength grades change the answer.
4. Maintenance, drive power and accuracy limits
The work either side of the setting: roll maintenance, motor sizing, throughput, and where the machine stops being the limiting factor.
Part of the 3-in-1 decoiler straightener feeder cluster, alongside the coil handling and feeding accuracy guides.

Frequently Asked Questions
How do I know when a straightener has run out of adjustment?
Watch the penetration reserve rather than the flatness reading. If the defect improves as you add penetration and then stops improving while the roll load keeps climbing, the machine is at its limit.
As a working rule, if you need more than roughly 80 per cent of the available penetration travel to hold the target, there is no room left for the next grade or the next coil. The honest answer at that point is a machine with more rolls.
How many straightening rolls do I need for 3 mm HSLA 420?
Nine rolls is the practical floor for that combination at a visible-panel flatness target, and eleven is comfortable if the target is tight or the grade varies.
Three millimetres of high yield strip needs enough reversals to work the section without cracking it, and a seven-roll machine will typically leave a residual bow that no amount of penetration resolves. Confirm against a strip sample rather than the grade name alone.
What flatness can a seven-roll machine realistically hold?
On mild steel up to about 3 mm, a well-set seven-roll straightener commonly holds in the region of 10 to 15 I over a one-metre span. Push the thickness or the yield strength up and that figure worsens quickly, often to the point where visible waviness returns.
A nine-roll machine typically holds under 10 I on the same material. Treat these as field observations, not guarantees, because roll diameter and pitch change the answer more than roll count does.
Should the roll gap ever be set below the strip thickness?
Only slightly, and only as a clearance correction rather than a flatness adjustment. On mild steel a small amount under nominal is normal. On pre-painted, coated or stainless strip the gap should sit at or marginally above nominal, because anything tighter marks the surface or starts the material work-hardening.
If you find yourself closing the gap well below thickness to remove a wave, the wave is coming from penetration, pass line or the incoming coil.
Why is the strip flat at the straightener but bowed after the press?
Three candidates, in order of likelihood. High yield material springing back across a long gap between the straightener and the die; feed rolls set with uneven pressure pulling the strip into a curve; or a die that is not sitting level. Measure flatness at the straightener exit first.
If that reading is good, the straightener is doing its job and further roll adjustment will only make the first reading worse.
Can pre-painted strip be straightened without marking it?
Yes, but the setting sequence changes. Keep the gap at nominal so the rolls are not pinching, do the work with penetration, keep the pass line accurate so the strip is not dragged across a roll, and use rolls in good surface condition with a finish suited to coated stock.
The remaining risk is a machine specification question: mandrel and roll contact materials designed for coated strip are what prevent the marking that no setting can remove.
Where to go next
The setup order on this page applies to any multi-roll straightener. If you are still deciding which machine the order should be placed for, start with the cluster overview and work outwards from the specifications.
Read the 3-in-1 decoiler straightener feeder guide