Which Roll Settings Mark Strip in a Straightener Feeder?
- Share
- publisher
- David Park - Senior Stamping Engineer, FANTY Machinery
- Issue Time
- Oct 10,2026
Summary
Marking is the most misdiagnosed fault on a coil line, and reducing roll pressure only hides it while flatness degrades. This article separates four patterns by their spacing, gives the order of checks that clears most cases without spending money, and states plainly when the marks arrived with the coil rather than from the rolls.
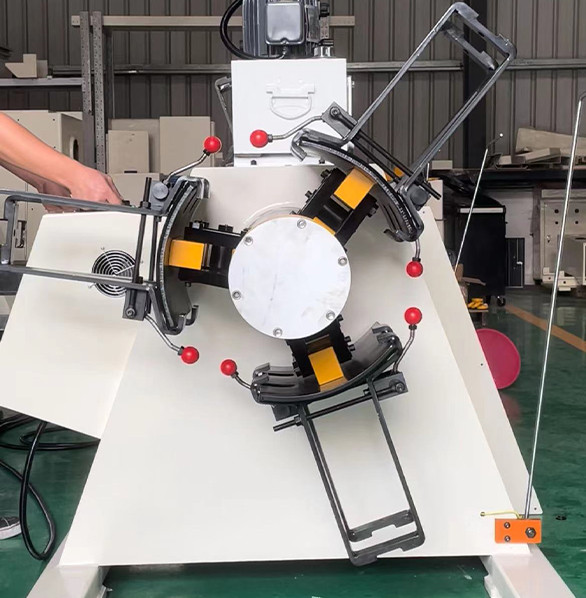
Run a finger along a marked strip and you learn very little. Run it under a light at a shallow angle and the pattern tells you almost everything.
Marking is the most misdiagnosed fault on a coil line, because four different causes leave four different patterns and only one of them is a pressure problem.
This article walks through what each mark looks like on an NC straightener feeder, which setting to change first, and when the marks are not coming from the rolls at all.

Operators usually respond to marking by reducing roll pressure, and that works just often enough to be misleading.
Lower pressure also reduces the penetration the leveler needs, so flatness quietly gets worse while the mark seems to improve. Two weeks later the customer rejects the flatness.
The first move is to identify the pattern. That costs five minutes and decides everything that follows.
Four Marks That Look the Same on the Floor
Four patterns cover most of what you will see on 0.5 to 1.5 mm strip. Each one points at a different part of the machine.
- Fine longitudinal lines. One or two continuous scratches running the length of the coil, always in the same lateral position.
- Regular transverse marks. A repeating pattern spaced at the roll circumference, not at the feed pitch.
- Broad dull bands. A soft, wide sheen across part or all of the width, with no defined edge.
- Edge-only marking. Damage confined to the outer 20 to 30 mm on one or both sides.
The spacing test is the fastest discriminator. Measure the distance between marks and compare it with the roll diameter and with the feed pitch.
Marks spaced at the roll circumference come from the roll surface. Marks spaced at the feed pitch come from slip or from the die.
Roll circumference is easy to work out. A 55 mm roll has a circumference of about 173 mm, so transverse marks 173 mm apart point straight at that roll rather than its neighbour.
Which Setting to Change First
Work down this order. The first three checks cost nothing and clear the majority of cases.
- Look at the roll surface under a light. A single embedded scale flake leaves a continuous scratch line that no pressure change will remove.
- Check the exit gap against strip thickness. On 0.8 mm CR4 the exit rolls normally sit at 0.95 to 0.98 of thickness, not below it.
- Wipe the rolls and run one metre. If the mark moves with the wipe, the cause is contamination rather than geometry.
- Compare the mark position with the guide position. Edge marks that line up with a guide roller rarely come from the leveler bank.
- Only then reduce pressure. Drop it in steps of 5 percent and watch flatness at the same time, because the two trade against each other.
If the mark survives the wipe test and the gap is correct, stop adjusting pressure. Something has changed in the roll surface itself.
A flat spot produces one mark per revolution and usually follows a jam or a coil break. Feel for it with the bank open and the rolls turned slowly by hand.
Cheap Fixes and Expensive Fixes
The cheap fixes and the expensive ones look identical on the strip, so identify before you spend.
| Cause | How to Confirm It | Where It Costs You |
|---|---|---|
| Embedded scale or debris | Wipe test, then inspect the roll under a light at a shallow angle | Two hours of polishing, or a week if the roll has to come out |
| Roll surface damage | Transverse marks spaced at the roll circumference | Re-grinding runs 400 to 900 USD per roll and needs the bank stripped |
| Excessive pressure | Broad dull bands that ease when pressure drops 5 percent | Cheapest fix, but flatness degrades if you take the pressure out permanently |
| Roll deflection on wide strip | Marking strongest at the centre on strip over 1,200 mm wide | Crown correction or a support roll, which is a machine change rather than a setting |
| Lubricant film failure | Marking starts an hour into a run and worsens as the line warms | 600 USD for a lubricant change, plus a trial to confirm the film holds |
| Guide or edge contact | Damage confined to the outer 20 to 30 mm on one side | Realignment, and possibly a camber problem in the coil that no setting fixes |
The last row is where most wrong purchases start. Buyers replace a leveler roll when the real fault is a guide that has moved 3 mm.
Before any roll comes out, run the machine with the guides backed off by 5 mm. Ten minutes of that test has saved more roll sets than any inspection schedule.
Marking That Arrives With the Coil
Marking has upstream sources, and a leveler bank is often blamed for damage that arrived with the coil.
The slitter or the mill. A burr on a slit edge drags through every roll and leaves a line that looks exactly like roll damage.
The payoff side. A peeler, a guide or a hold-down that touches the coil face leaves a mark before the strip reaches the leveler at all.
Coil handling. A coil that was dropped or banded badly arrives with dents that no roll setting will remove.
Thin or soft stock. Below about 0.3 mm, or on fully annealed material, any roll contact marks. That is a limit of the process rather than a fault in the machine.
Cosmetic stock. Pre-painted, brushed or polished strip needs non-marking rolls and low pressure, and may still need a protective film.
If marking appears only on material from one supplier, stop adjusting the machine and test the coil.
Surface quality and flatness are measured with different instruments, and the roll geometry behind both is set out in the coil line guide library.
How to Set Roll Pressure for Coated and Bare Stock
Pressure is a compromise between flatness and surface, and the correct setting depends on the material rather than on the machine.
On bare 0.8 to 1.2 mm CR4 at 1,000 mm width, a five-roll bank normally runs with entry gaps at 1.02 to 1.05 of thickness and exit gaps at 0.95 to 0.98.
That progression does the bending work in the middle rolls and leaves the last roll pair doing little more than guiding the strip out.
On pre-coated or polished stock, back the exit gap off to 0.99 or 1.00 of thickness and accept a slightly softer flatness figure.
Below 0.5 mm the whole bank runs closer to nominal thickness, and the pressure limit is set by the coating rather than the steel.
On a 120 SPM line, taking 10 percent out of the exit pressure typically costs 0.3 to 0.6 mm per metre of flatness. Measure both before and after, or you will not know which one you traded away.
Roll material is the other half of that trade. Hardened and chrome-plated rolls resist debris pickup, while polyurethane rolls protect a coating at the cost of a shorter service life.
What to Record After Every Coil Change
Marking is a trend before it is a defect. Four readings turn it into something you can see coming.
- Roll condition. Wipe the exit roll and note any debris; a scratch that repeats in the same place is a roll problem.
- Exit gap setting. Record the number per material grade, so a drift in the setting is visible rather than remembered.
- Flatness at the exit. Millimetres per metre on the first and last part of each coil.
- Coil supplier and heat number. Marking that tracks a supplier is a material conversation, not a maintenance one.
None of the four takes more than two minutes, and together they replace a fortnight of guessing with a single line of data.
FANTY supplies these machines with hardened and chrome-plated rolls as standard, which is the surface specification that keeps the first two causes off the list.
If you are comparing roll configurations for coated or cosmetic stock, the coil line product range lists the standard roll materials and diameters.
Three questions come up on almost every marking investigation we are asked about.
At what pressure does a leveler roll start marking 0.8 mm strip?
There is no universal number, because surface finish decides it. On bare CR4 the exit gap can run at 0.95 of thickness; on pre-coated stock keep it at 0.99 or above.
Does a 0.02 mm mark show up after painting?
Marks around 0.02 mm deep are invisible on bare strip and clearly visible after a top coat. Check under a shallow light rather than by touch.
Can replacing 1 of 5 rolls fix transverse marking?
Only if the damage is in that roll. Marks spaced at the roll circumference need the position measured against each roll diameter first, which takes about 20 minutes.
Where to go next
This article sits in the straightening branch of the coil line guide library. It diagnoses one surface defect rather than covering the roll geometry that produces it.
Read the flatness and roll setting guide